Wednesday, February 22, 2012

Washing biracial (or curly) hair: My how-to

My daughter has extremely curly hair. People always comment on her hair, and when we're out people ask me where she gets her curly hair (me) and if it's naturally that way (No, I permed my 1-year-old's hair... Who are these people?). The most common question I get asked in emails from blog readers is how I manage Lil' J's curls. What can I say? It's a hot topic in our lives.
I have written the same response over and over again so I figured I should just write a blog post about my routine, that way I can link people here from now on.

First off, I don't wash her hair very often. Usually once a week to every 9-10 days. I use It's a Curl which I buy from Curlz.biz. I like it because it's organic, and gentle on her head. I haven't ever died or relaxed my hair and I want to be equally as cautious with hers.

They have a very active facebook page and when I was asking for a good product the directed me to their hair type page which matches the best products for different hair types and biracial hair tips. For kids under 2, this is the best because it's so gentle. I plan to keep using it after though. Make sure you check their fan page and retailmenot.com for deals. There's usually a coupon for 25% off. For February there's one using code "ilovecurls".

I bought the entire line (twice), It's a Curl Shampoo, Conditioner, Moisturizer and Leave in Conditioner. A long time ago I read a post by my friend Melissa and her hair washing routine for her little curly head. I couldn't find it for this post but I'm hoping she'll read this and share the link. I think our routines are pretty similar if I remember correctly.

For washing her hair and getting her curls "set" I use the shampoo and conditioner. I also use a big-tooth comb.

I've tried many variations of these steps and I think I've found what works best for her hair so hopefully this will help for many of you.
Before
1. I wet and wash her hair with the shampoo. I don't use a ton of shampoo, just one squirt. Again, I don't shampoo it often, maybe once a week or week and a half. A lot of shampoo tends to dry her hair out more so I try not to use a lot.-Just enough to clean her hair, and rinse. Make sure you get all the shampoo out, no bubbles left.

2. With conditioner I'm very generous. This is what will get the tangles out so I use a lot and literally cake it in.

3. Comb those curls. I start with the wider-tooth part of the comb and comb through it, then switch to the other side, where the teeth are closer together to get more tangles out. This combs the conditioner through the hair too. I hang tight closer to her scalp while tugging at the ends so she doesn't feel it. She's usually playing with her toys and not minding what I do.

4. Rinse out all the conditioner.

5. Comb again with the wide-tooth end.

6. Don't towel dry or blow dry. Let your curly head run around until it's dry. This is important because a towel will frizz it up, and if they go to sleep with it damp they'll wake up with their hair sticking out and squished in weird places.

Here's a morning where I let her go to bed a little too soon before her hair was totally dry.

Here's an afternoon where I washed her hair mid-day and let it dry outside while she was playing.

Between washing sometimes I"ll use her leave-in moisturizing and conditioning products to keep the friz down and the curls cute.
 
Hope this helps! Any other questions? Leave it in the comments and I'll get back to you! And if you have a similar post or tips feel free to leave a link in the comments, different things work for different people.

Labels: , ,

Monday, October 17, 2011

Fall Children's Art Project: What I'm Makin' Monday

DIY Fall Crayon Leaves.

Here's a fun family craft to try with your kiddos if they won't eat the crayons...
What you need
Wax paper (about $1.25 at walmart)
Crayons (50 cents a box if you don’t have any laying around)
Scissors
Sharpie (later I found a pencil worked better for second tracing)
Brown paper grocery bag
Iron
Not pictured:
*pencil sharpener with larger hole (or cheese grater or scissors)
*paper towels
*leaf or two

1. Cut open a brown paper bag and lay it down to try and protect your counters.

2) Then peel paper off crayons and make shavings using a pencil sharpener.
3) Rip two pieces of wax paper off the roll and sprinkle one sheet with crayon shavings. Lighter sprinkling (not heavy concentrations) works best. Brown and dark colors didn’t work as well as the brighter ones. Hot pink worked great with the oranges!
4) Place the second sheet of wax paper on top of the shavings,
...Put a paper towel or two down on top and iron.
5) Trace your leaf with the sharpie, then set your melted creation ('sandwich') on top of the leaf drawing and trace leaf shapes. (The second tracing step here worked better with a pencil)
6) Cut out the leaves! You can add stems to some, but they’re kind of fragile and crunch off easy.
TADAA! What do you think?! You could use fishing line or thread and make a really neat mobile, or tape them to a window for the sun to shine through.
 
This would make a great Fall decoration for a classroom too!

I may try to turn mine into a mobile and hang it outside. I'll add some more photos once I complete that task!

Big thanks to Cambria Laine for this craft idea.

Make anything lately? Craft? Food? Anything? Please link up and share, I'd love to see!

What I'm Making Monday

(highlight ctl+c)

Also linking to:
Sumos Sweet Stuff

Labels: , , ,

Monday, October 10, 2011

DIY Halloween Candy Corn Hat Tutorial (no-sew): What I'm Makin Monday

I'm totally into everything Halloween right now, Halloween crafts included. So when I got this craft idea from Cambria Laine I was thrilled to try it out.
How adorable is this little candy corn hat? It takes moments to make and it doesn't require a sewing machine. Cute right? Here's how it's done.
Supplies needed:
 3 pieces of felt. (1 yellow, 1 orange, 1 white. In my area these are about 25 cents each)
Scissors
Stitch witchery (or heat n' bond) (you can sew this instead if you wanted).
Pen
Iron
measuring tape

Instructions:
1) Measure around your baby’s head, add about 1 inch ease for each side to allow for seams/etc.
(Write the measurement down, divide that number by two and add two inches. Save this number for later use.)
Example: My child’s head is 18 inches. Divided by two: 9 inches. I added 1 inch. = 10 inches :)

2) Cut the strips of felt in half the lengthwise so you have long enough strips to work with.
Begin assembly!

Overlap edges of each of the three strips of felt about 1/4 inch.
**Make sure you’re doing it in a “orange, yellow (middle), white (top) candy corn pattern.**
My stitch witchery is too wide so I had to cut a few 11-12 inch pieces and slice them down the middle making 2 strips out of each piece.
3) Using stitch witchery, iron together at each 1/4 inch overlap (repeat for each layer) to fuse them instead of sewing. (Or you could sew them).
4) Cut off half the height of the white strip...I think it looks more proportionate this way. (It was an oops after thought!)
5) REPEAT steps #3 & #4 for other side of hat.

6) Fold up about a 1/2 inch of the orange edge (for a more finished brim) and use a piece of stitch witchery and your iron to fix it in place.

7) On the wrong side of the fabric (back) mark your measurement (from step #1 above).
*I used my 10 inch measurement from above.* Cut off the excess.
8) Fold in half vertically. Put a small pen mark where it folded together at the CENTER of the top (on the white part - but make sure you mark the back of fabric). Then put a small mark about 1 inch on either side of this center mark so there are three at the top.

9) Take a ruler and draw a line from one of the outer marks to the bottom corner of your fabric. Repeat for other side to create a triangle type shape.
10) Take the triangle and lay it on top of the other uncut piece. Use it to trace for cutting second side of hat into a triangle.

11) Lay two pieces of the stitch witchery (cut in half so it is thinner) up and around the sides and top of the triangle. Set other half of hat on top like a sandwich face down and iron the two layers together.
Note: Make sure you put the stitch witchery on the RIGHT side of the fabric (the side that will be showing when your hat is done.) This sounds backwards but when you turn your hat right side out it’ll be nice!
12) Turn right side out and enjoy!
With all of Lil' J's hair and my imperfect cutting, mine came out a tad bit smaller than I had hoped. So I used hair clippies to pin it to her head. Still cute if you ask me! Just keep that in mind when you're cutting. What do you think? Adorable, no?
Take lots of pictures of your cute baby wearing the hat and be sure to come back and share one!

Made anything lately? Craft, recipe, tutorial, etc? Show it off an link up below! Grab my button if you like or just link back here to keep the hippidy hop going.
What I'm Making Monday


(highlight ctl+c)

Labels: , , ,

Monday, December 27, 2010

Little Ms. Claus Dress: What I'm Makin' Monday

Monday is almost over, but I figured it's better I post it today than next Monday when it's WAY after Christmas! I'm so proud of my creation!
I can't take all of the crecit cause I got an idea to make a dress like this after seeing a similar one by my friend Jess's sister who own's the shop Our Little Tutus. So if you think you can't make one of these, you can buy one for under $30!

I saw a picture of her Santa tutu dress and decided to create one with the flair of a pettiskirt. So I made a tutu pettiskirt style dress using tulle, ribbon, a red crocheted baby beanie and headband and feathers/more tulle.

I made it by hand sewing together a red baby beanie I opened up to a wide baby headband.

Then I made the tutu dress like I explained in this tutorial. Then I tied small white strips to the ends of the red tulle skirt to make it look like a mock pettiskirt.
I added more frill by hand stitching a feather boa-like embellishment to the top front of the dress bodice. Note: DON'T stitch it all around. I did that at first and forgot that she'd have to fit in it. The bodice gives but the feather's didn't so I had to undo half of my stitching around the back.

After a photoshoot with the feather's I realized baby drool and feathers don't mix so I went back and tied white tulle to the top of the bodice (the same way I did with the red around the bottom) and trimmed it all down to the same length.

I added a black satin ribbon as the Ms. Claus belt with a rhinestone buckle (I found at Hobby Lobby).
TADA!

Labels: , , , , , ,

Tuesday, May 4, 2010

Tutus Galore {and Giveaway}!: What I'm Making Monday

What I'm Making Monday
When I found out I was having a girl I knew I was in trouble. KNEW I was in trouble. I've been the most prissy little thing on the block practically from birth myself. My mom taught me well, and I plan to do the same with my little one.

Now tutus are great. I never was a ballerina (pigeon toed plies don't work) but I loved to dress like one. Even if that meant tights under bathing suits, I did what it took. However, I don't recall having a tutu. My daughter won't have that problem. And neither will yours!

I was on Twitter one day rambling about wanting to buy a tutu at an affordable price when someone directed me to this tutu tutorial.

Wow, seriously, is it that freaking EASY?!

Yep.

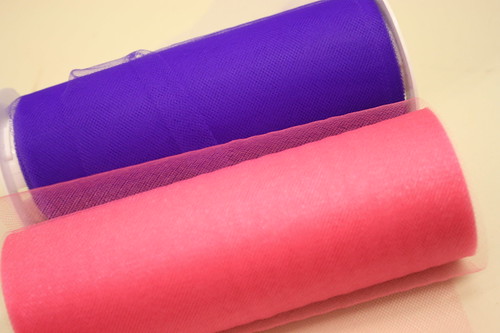
I went to Hobby Lobby and bought two rolls of tulle.. The ones that are 25 feet by 6in for $2.99 each. THIS made it WAY easier. The tutorial doesn't mention these things!

I also bought a roll of elastic for under $2.


Cut the elastic. I measured it to be about 6-8 inches I believe using some other of Spawnie's clothing to gauge how wide to make it (waist size). It also stretches out a couple of inches after you add the tulle so be aware of that.


I stitched it together with my sewing machine. It's not working well right now but it was able to hang in there and stitch a half and inch back and forth for me in about 15 seconds.


All I had to do was cut the tulle twice the length I wanted it to be on the skirt.

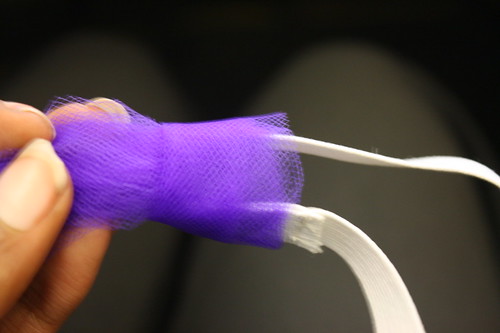
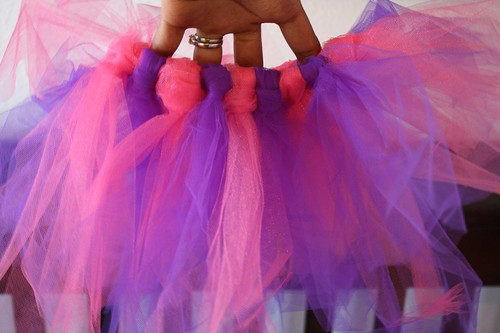
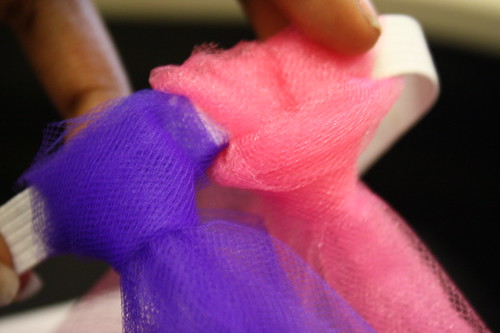
Then loop the tulle around the elastic like so...


I wasn't a boyscout so I'm not sure the exact name of this knot but it's EASY! Just loop it under the elastic and pull the tulle through the other side. Doesn't matter which way the knot sits cause you can turn it before pulling it tight.


Do that over.


And over, and over!


TADA!!!

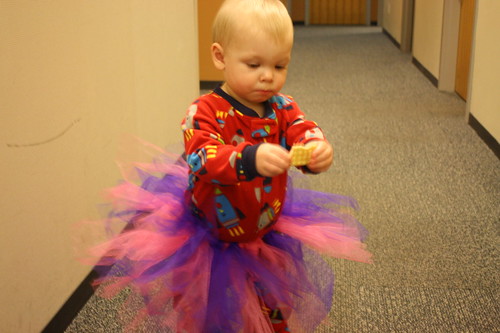
The only baby I had to model it at the time was a boy :( Don't worry, his parents knew this was for a project of mine, plus he loved it too! He's one so I think it can fit from infant up to about a one year old!


You can also add ribbon and flowers and fun things to them if you want. Mix and match the colors or make them solid colors, HAVE FUN with it!


*** NO SEW TIP***
If you don't want ANY sewing at all (cause of the elastic step in the beginning) you can use RIBBON instead. Satin ribbon works great, but make it EXTRA LONG so you can tie a pretty bow once it's on your little princess. Tie the tulle around the ribbon the same way as shown earlier then tie it around your little girl when it's all done! No sewing needed!!


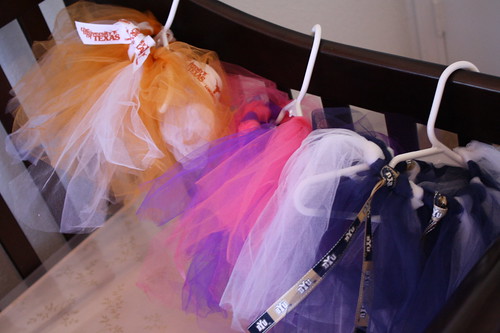
The 2 rolls of tulle made two matching tutus so I gave one to a friend (with a baby girl) and Spawnie has the other waiting for her! I can't wait to show you another photo with her in it! Overall that cost me about $8 for two tutus... Not bad right?


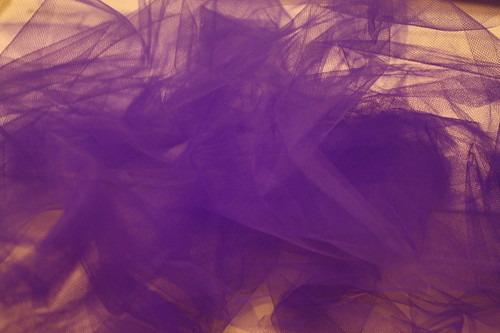
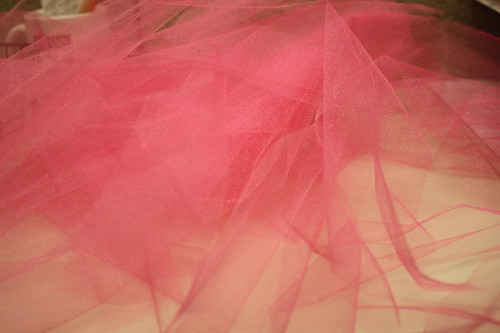
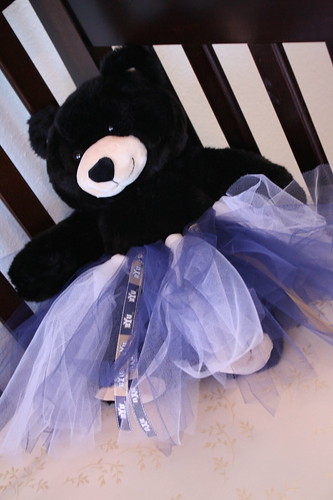
THEN I went CRAZY and bought TONS of tulle on Ebay... TONS. Here's my tulle drawer And that's not all of it cause it was just 50% off at Hobby Lobby and I got 3 more rolls. Most of the tulle I bought on ebay was the same roll size (it cuts down on cutting SO MUCH) and I got several for about $1 and free shipping! So I've been making my little girl tutus for under $2 now and Spawnie has a collection of ooh, I think about 8 tutus so far. I've taken a break from tutu making to finish her room etc, but once I'm done I'll be back to upping her collection!

And now you can make some too!

Don't have time or patience to make you own tutu? I recommend Cutie Patutus! They have the most ADORABLE selection of tutus that are so elaborate I couldn't even begin to figure out how to make!

Next tutu I make for Spawnie I'll make a matching one for one of you to win! I usually have enough tulle for two but she doesn't need two duplicates, SO one of my blog followers who leaves a comment will be entered to win a matching tutu of Spawnie's! Colors not yet determined but I promise they'll be cute.
Want an extra entry? Participate in What I'm Makin(g) Monday. Post this button on your blog and link up your What I'm Making post!
What I'm Making Monday


Labels: , , , , ,